
 When it comes to packing household goods, some belongings require special care and attention. This is especially true for things like framed pictures, mirrors and professional artwork. You don’t want to arrive at your new home and find shattered glass, chipped frames or punctured canvases.
Steps for packing picture frames and mirrors
Whether it’s a $30 painting from the store or your Grandma’s antique mirror, you want to make sure it’s safe during transit. Start by gathering the appropriate supplies, then follow these steps:
- Using the artist’s tape, create an “X” across the glass. This will help keep the glass intact during transit.
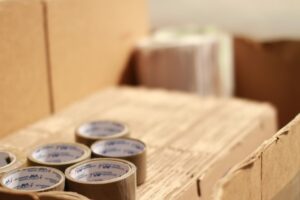
- Cut a piece of cardboard or foam board slightly larger than the frame, place it over the glass and secure it with packing tape.
- Wrap the entire piece in two or more sheets of packing paper and tape loose ends.
- If you want, add a layer of Bubble Wrap for additional padding and security. Secure with packing tape.
- Cushion the bottom of a picture/mirror box with packing paper, and then slide the object into the box. Keep in mind, large items should be boxed individually in specialty boxes. Smaller mirrors and framed pictures can be wrapped and boxed together. Stack these items vertically and do not lay them flat.
- Fill extra space with more paper to prevent shifting.
- Tape and label the box “fragile” on all sides.
How to move canvases
The best way to pack a canvas will depend on if it’s stretched across a wooden frame or rolled. Here are the steps for each scenario:
Stretched
- Cover the canvas with glassine, acid-free or archival paper.
- Tape a sheet of foam or cardboard to the back of the canvas.
- Put the canvas into a plastic gallery wrap bag to protect it from moisture.
- Wrap the entire thing with two layers of Bubble Wrap and secure it with tape.
- Sandwich the canvas between two sheets of foam boards or cardboard and use the packing tape to bind the pieces together.
- Line a picture/mirror box with padded paper and slide the canvas into the box, filling empty spaces with more paper.
- Tape and label the box.
Rolled
- Lay the canvas between two sheets of your choice paper (painted side down).
- Loosely roll the canvas and paper (rolling too tight can cause damage).
- Roll with Bubble Wrap.
- Slide the canvas into a cardboard tube.
- Place the end caps on and seal them with packing tape.
- Label the tube.
Best way to store loose photos
If you’re like most people, you probably have hundreds or thousands of loose pictures buried away. Organizing them can be time-consuming, but well worth it — especially if many are older and irreplaceable. There are three ideal ways to organize loose photos:
- Albums. Probably the most popular way to store pictures is in an album. However, you’ll want to avoid “magnetic” peel-and-stick albums and ones that aren’t acid- or lignin-free because they can cause damage to the pictures. Wrap albums in a layer of packing paper, and stack them vertically inside a moving box.
- Photo boxes. These come in all sizes and colors and are great for long-term storage — just make sure to use acid-free cardboard or metal boxes. Many also come equipped with divider index cards to help organize, but if they don’t, you can also layer the photos between sheets of acid-free paper. Or, simply lay them flat in the box. When it comes time to move, wrap the boxes in packing paper and place them inside a moving box.
- Digital storage. Digitally backing up images will take some time, but you’ll be happy you did if something ever happens. At the very least, consider digitally storing your favorite photos. Do this by scanning the images to a computer and then storing them on a cloud service, an online photo storage website, an external hard drive or a USB Flash Drive. Or, upload them directly from your phone, tablet or camera.